How to increase internet speed in windows 10. if internet speed has slowed down. while we working on the internet, then this thing makes us very disappointed. mostly time the reason behind the slow speed of internet is our device. which we use. but the problem of slow speed of the internet is revealed also in Windows 10. Those people who are installing Windows 10 on their computer or upgrading their existing windows into Windows 10. So those people are complaining about the slow internet.
So let's talk about that reasons which make slow our internet speed.


So let's talk about that reasons which make slow our internet speed.
1: Turn Of Background Apps-
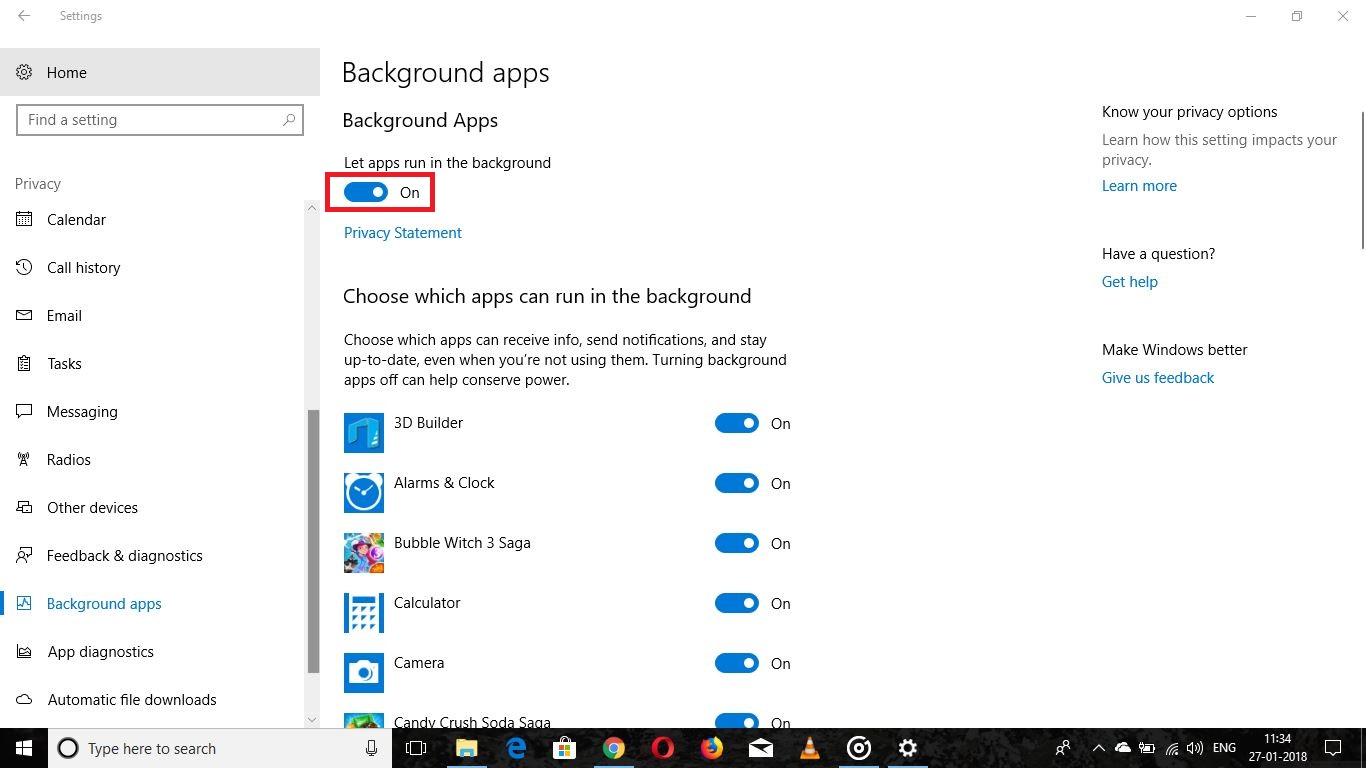
When you are installing windows 10 on your PC or upgrading your existing window into windows 10. then, first of all, you have to need that turn-off background app. because many apps run in the background. when you are doing work on the internet. and these apps eat your data and make slow your internet. so turn-off background app by following steps and save your data.
Step:- 1 First go to the "settings"
Step:- 2 Go to the "privacy"
Step:- 3 Then scroll down and go to the "background apps"
2: Clear Temp Files And Cached Files Of Your Windows-
Step:- Go to "Settings" – > "System" -> "Storage" -> "Change how we free up space"
Then click on the "Clean Now" for the clean all cache files from your PC.
3: Disable All Windows Update Service-
If you think that disable windows 10 update is recommended then you think Wrong. Because automatic updates are a great thing for your Windows 10 OS. it’s always good to keep your PC updated to the latest version of Windows 10 OS. but if you are struggling with the low speed of your internet or want to keep your internet data then you have to need to disable windows updates. you can disable updates for downloading particular files for few days. you can turn it on anytime in the future.
"For disabling all windows service follow these steps"
Step:- 1 Go to the windows 10 taskbar search and search "Service"
Step:- 2 Then click on the "Service"


"For disabling all windows service follow these steps"
Step:- 1 Go to the windows 10 taskbar search and search "Service"
Step:- 2 Then click on the "Service"

Step:- 3 Now Scroll down a bit then double click on "Windows Update"

Step:- 4 Now go to the "Startup Type" and disable the updates.

Step:- 5 And now Reboot your PC.
4: Change DNS Settings
Whenever you take a connection of the Internet, they will provide you with the necessary networking settings including the "DNS" address. So you can use it to load any files or quickly load websites. and also you can use it to download any file. Sometimes your "DNS" server is responding slow. so you have to change its settings to improve your browsing experience.
So let's go to the steps of change DNS settings.
Step:- 1 First go to the "Control Panel"
Step:- 2 Then click on the "Network And Internet"

Step:- 3 Then click on the "Network And Sharing Center"

Step:- 4 Now click on the left side of your screen on "Change Adapter Settings"


Step:- 1 First go to the "Control Panel"
Step:- 2 Then click on the "Network And Internet"

Step:- 3 Then click on the "Network And Sharing Center"

Step:- 4 Now click on the left side of your screen on "Change Adapter Settings"

Step:- 5 Then Right-Click on the "Network Interface Connected" then click on "Properties"

Step:- 6 Then select the "Internet Protocol Version 4 (TCP/IPv4)" and then click on "properties"

Step:- 7 After that now click on the "Use the following DNS server addresses"

Step:- 8 Type your preferred and alternate DNS server addresses. Here you can enter any DNS servers you want, including from free ones such as Google Public DNS or OpenDNS.
1: DNS address of Google public is "8.8.8.8 and 8.8.4.4"
2: OpenDNS address is "208.67.222.222 and 208.67.220.220"
Step:- 9 Then click on the "ok"
Step:- 10 And now click on the close to apply the new DNS settings to the adapter.


0 Comments